


Tags:Doomsday Tower Defense Best Layout, Tower Defense Strategy, Advanced Guide, Shock Tower Usage, Rocket Tower Placement
Part 1: The True "Tier List" of the Six Defense Towers
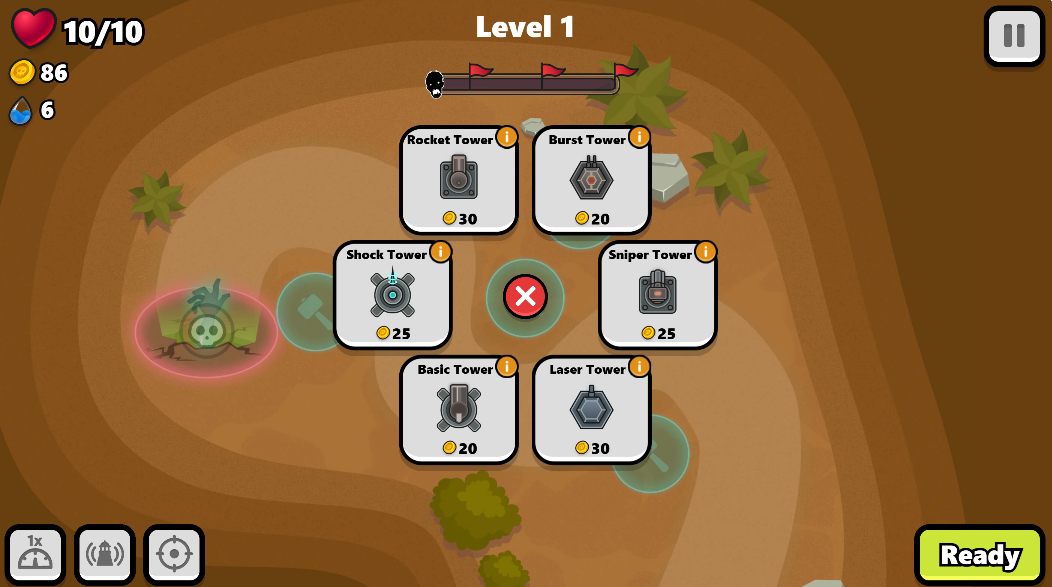
Rocket Tower (30g): This is the only source of AOE (Area of Effect) damage. Even with slow attack speed, the value of one shell blowing up a group far exceeds single-point damage. It is the "Muscle" of your defense line. Shock Tower (25g): This is the "Brain" of the game. Its job isn't to kill, but to freeze mobs in place for the Rocket Tower. Without a Shock Tower, half your Rocket shots will miss or only hit a single target.
Laser Tower (30g): The ceiling for single-target damage. But this thing is only suitable for Bosses. If you use it on small mobs, that's "using a cannon to kill a mosquito"—a massive waste of money. Sniper Tower (25g): The Sniper has a hidden mechanic: Global/Super-long range. But its attack speed is too slow. Its only purpose is "Cleanup" (Finishing off low HP leaks).
Basic Tower (20g): Purely a transitional item. You might leak without it in the first 5 waves, but if it's still on your map after Wave 10, you are wasting land. Burst Tower (20g): A slightly more advanced Basic. Faster fire rate, good for clearing the fast "dog-type" mobs, but do not count on it as a main force.
Part 2: Building "The Kill Box" — Core Layout Logic
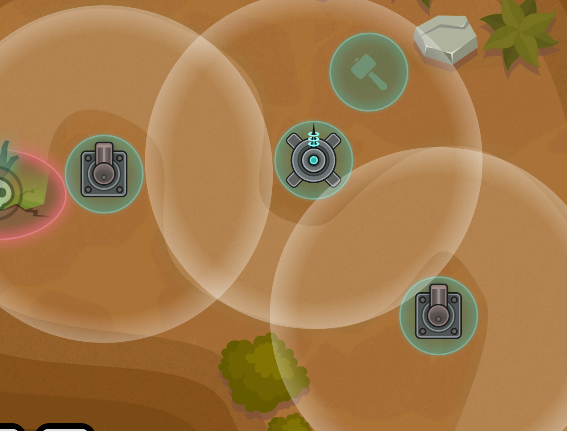
The Carry Spot (Core): Place the Shock Tower. Ensure its circle covers the entire bend. The Guard Spots (Hugging the Core): Directly to the left and right of the Shock Tower, place 2 Rocket Towers.
Part 3: Step-by-Step Operation Guide (Wave 1 to Clear)
Action: Build 2-3 Basic Towers or Burst Towers not far from the monster spawn point. Detail: Don't aim for a full HP clear in this phase. Leaking one or two mobs is fine. We need to save money. As long as you kill most of them, do not upgrade towers. Taboo: Absolutely DO NOT buy a Sniper! Slow towers in the early game are suicide.
Action: Go to the "Golden U-Turn" spot mentioned earlier. Place the Shock Tower (25g). Immediately add a Rocket Tower (30g). At this point, you will see the difficulty drop instantly. Monsters can't move, and then they get blasted away. Spend all subsequent money stacking more Rocket Towers around this core and upgrading them.

Catching Leaks: Place a Burst Tower right at your base entrance. Execution: Place a Sniper Tower or Laser Tower in the spot with the widest view of the map. Key Setting: Click on this Sniper Tower and change its Target Priority from "First" to "Strongest". This step is crucial! We don't need the Sniper hitting half-dead mobs at the front; we need it to focus fire entirely on the full-HP Boss.
Click to Play: Doomsday Tower Defense